Why You Must Upgrade Windows 10 to Windows 11 Now
The countdown to October 14, 2025, has officially begun for businesses across Australia still relying on older operating systems. After this date, Microsoft will reach the Windows 10 end of life milestone, meaning they will no longer provide technical support, software updates, or—most importantly—security patches. To stay protected, it is essential to upgrade Windows 10 to Windows 11 to ensure your company data remains shielded from evolving digital threats.
Meeting ACSC Standards During the Windows 10 End of Life
Maintaining a modern, supported operating system is a core component of the Australian Cyber Security Centre (ACSC) Essential Eight framework. By moving to the latest version, you ensure your business receives critical security updates that help mitigate the risk of ransomware and data breaches. At OnIT Solutions, we frequently see how unpatched software becomes the primary entry point for intruders, which is why we prioritise lifecycle management for our managed IT clients. This proactive approach not only protects your reputation but also aligns with local compliance requirements for data privacy.
A Free Windows Upgrade Designed to Keep Files and Apps
Many business owners worry that a major system change will disrupt their daily operations or lead to lost spreadsheets and emails. However, this free Windows upgrade is specifically designed to keep files and apps exactly where they are. Whether it's your custom accounting software or your carefully organised folder structure, the transition is remarkably smooth, allowing your team to continue working with minimal downtime. Everything stays in its place—from your desktop shortcuts to your browser bookmarks.
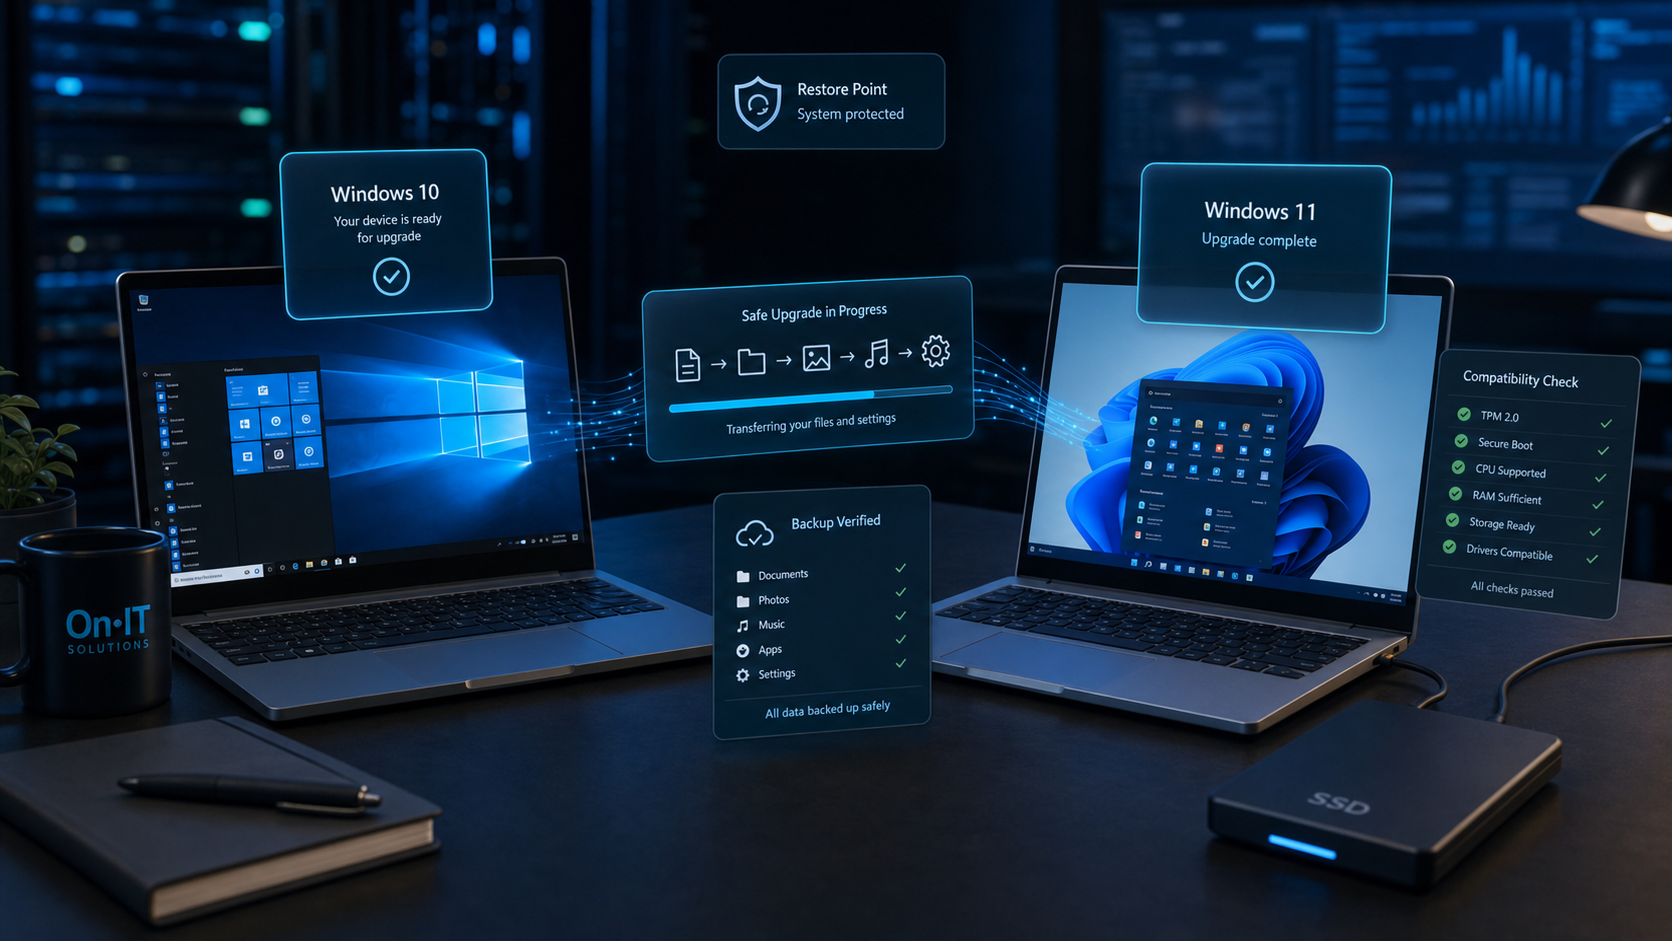
While you might be concerned about strict Windows 11 system requirements, many modern business PCs are already equipped to handle the move. Even if your hardware is a few years old, there are official paths to verify compatibility and secure your fleet before the 2025 deadline arrives. Taking a few moments to assess your current setup now will save your team from a frantic, last-minute hardware scramble when support finally disappears. Understanding the hardware landscape is the first step toward a successful transition for your office equipment.
Checking Windows 11 System Requirements and Compatibility
Walking into the office and discovering a compatibility error message can feel like an unnecessary roadblock, but most modern business computers are more capable than you might think. Determining if your hardware is ready to upgrade Windows 10 to Windows 11 doesn’t have to be a technical headache if you know which tools to use. Even if your current PC or laptop has been in service for a few years, it likely possesses the foundational components needed to run the new operating system securely and efficiently.
Understanding Official Windows 11 System Requirements
Microsoft introduced stricter hardware standards for this version to enhance overall security, focusing heavily on two features: TPM 2.0 and Secure Boot. These Windows 11 system requirements act as a digital "security guard" for your computer, preventing unauthorised software from hijacking the boot process. While these requirements are the gold standard for protection, many Australian SMBs find that their existing fleet is already compliant once the correct settings are toggled on. If you are unsure, Microsoft provides a free tool called the PC Health Check app that provides a simple "Yes" or "No" regarding your device's readiness.
Using Official Tools for Older Hardware
If your older office equipment doesn't perfectly match every specification, you can still achieve a free Windows upgrade without resorting to risky third-party workarounds. By using Microsoft’s official installation media and deployment tools, you can often bypass certain hardware checks on older systems while still maintaining a stable environment. This is a much safer route than downloading "cracked" versions or unofficial patches from the internet, which could expose your business to the very cybersecurity risks you are trying to avoid. Using official channels ensures that your apps and settings remain functional throughout the transition.
Assessing Your Fleet Before the Windows 10 End of Life
For businesses with multiple workstations, verifying compatibility early is the best way to avoid a last-minute hardware scramble as the Windows 10 end of life deadline approaches. We recommend performing a quick audit of your devices to identify which ones are ready for an immediate move and which might need a minor configuration change. Taking a proactive stance allows you to phase the rollout across your team, ensuring that everyone can keep files and apps while moving to a more secure platform. If you find the manual checking process overwhelming, our managed IT services can automate this audit for your entire office in a single afternoon.
- Download the official PC Health Check app from Microsoft to get a baseline compatibility report.
- Check your system settings to ensure "TPM" and "Secure Boot" are enabled if the report shows them as missing.
- Note down any "unsupported" devices to determine if you will use the official deployment tool bypass or plan for a hardware refresh.
- Ensure all pending Windows 10 updates are installed before you attempt the move to the new OS.
Once you have confirmed that your hardware can handle the transition, you are ready to begin the actual installation process and see the new interface in action.
How to Perform a Free Windows Upgrade Without a USB Drive
Skipping the requirement for a physical USB drive makes the transition to a new operating system much more accessible for busy office managers and staff. You can initiate the free Windows upgrade directly from your desktop, using Microsoft's official installation tools to handle the heavy lifting while you continue with other tasks. This method is particularly effective for Australian SMBs that want to standardise their fleet and upgrade Windows 10 to Windows 11 without the manual labour of creating bootable media for every individual machine.
Step-by-Step Installation Using Official Media
To begin the process, you need to download the official Windows 11 installation assistant or the disk image (ISO) directly from Microsoft’s website. This ensures you are getting a verified, secure version of the software rather than a potentially compromised third-party download. Once you have the file, follow these steps to get started:
- Navigate to the Microsoft Windows 11 download page and select the 'Installation Assistant' or 'Create Windows 11 Installation Media' option.
- Run the downloaded
.exefile and grant it administrative permissions when prompted by your computer. - Accept the Microsoft Software License Terms to move forward with the setup.
- The tool will perform a quick check to see if your hardware aligns with the Windows 11 system requirements; once cleared, it will begin downloading the necessary files.
Choosing Options to Keep Files and Apps
The most critical moment in the setup process is the 'Choose what to keep' screen, which determines whether you perform a refresh or a destructive clean install. To ensure a seamless transition for your business operations, you must select the option to keep files and apps. This setting ensures that your user profile, local documents, and installed programs—like your accounting software or CRM—are migrated exactly as they are. If you want an extra layer of protection, our cybersecurity team recommends ensuring your latest work is synced to your cloud solutions before clicking the final 'Install' button.
Managing the Background Installation Process
One of the best features of this method is that the initial installation runs in the background. This allows you to keep working on your spreadsheets or responding to emails while the system prepares the new environment. The installer is designed to be "set and forget," meaning it will only prompt you for a restart once the heavy lifting is complete. When the computer eventually reboots, it will finalize the transition, preserving your existing Start menu layout and folder structures so your team can get back to work without a steep learning curve. Every folder will remain where you left it, ensuring your digital workspace feels familiar from the moment you first log in.
Verifying Your Installation and Post-Upgrade Cleanup
Seeing your brand-new desktop for the first time is exciting, but there are a few essential housekeeping tasks to perform before you get back to business as usual. Once you successfully upgrade Windows 10 to Windows 11, you need to ensure the system is fully optimised and that no unnecessary "junk" files are hogging your precious storage space. Taking these final steps will help your computer run faster and ensure you are fully protected against the security vulnerabilities associated with the Windows 10 end of life deadline.
Confirming Your Version with the Winver Command
The first step is to verify that the free Windows upgrade has registered correctly and that you are running the latest official build. While the centered taskbar is a good giveaway, checking the internal version number ensures that the installation didn't hit any silent errors during the final stages. This is particularly important for Australian business owners who need to provide audit logs for cybersecurity compliance.
- Click the Start button (now in the center of your screen).
- Type
winverinto the search bar and pressEnter. - A small dialogue box will pop up; look for "Version 23H2" or higher to confirm you are on a modern, supported build of Windows 11.
Optimising Performance and Addressing Windows 11 System Requirements
Even though the installation is finished, Microsoft frequently releases "Day 1" patches to help the new OS communicate more effectively with your hardware. This is a crucial step to ensure that your specific Windows 11 system requirements—like your graphics card or Wi-Fi adapter—are working at peak efficiency. Running these updates immediately can prevent common glitches like printer connectivity issues or slow application loading times.
- Open the Settings app by clicking the cog icon in the Start menu.
- Select Windows Update from the left-hand sidebar.
- Click the Check for updates button and allow the system to download any pending security patches or driver improvements.
- Restart your computer if prompted to finalise the performance tweaks.
Reclaiming Storage Space While You Keep Files and Apps
One of the best parts of this process is that you get to keep files and apps exactly where they were, but this "in-place" upgrade creates large temporary folders on your hard drive. Specifically, you may see a "Windows.old" folder or temporary installation directories on your C: drive. Once you have browsed your documents and confirmed everything is intact, you can safely delete these files to free up several gigabytes of space, which is especially helpful for laptops with smaller SSDs.
- Open File Explorer and navigate to "This PC" to check your C: drive for any leftover installation folders.
- To clean them safely, search for Disk Cleanup in the Start menu, select your C: drive, and click "Clean up system files."
- Check the box for "Previous Windows installation(s)" and "Temporary Windows installation files," then click OK.
By clearing out these remnants, you ensure your device remains snappy and responsive for your daily tasks. With your system verified and cleaned, you can now focus on ensuring your long-term data safety and recovery plan is just as robust as your new operating system.
Data Safety and Recovery: Tips to Keep Files and Apps Secure
Even the most reliable software updates can occasionally hit a snag, especially when performing major system changes across multiple office computers. While the official process to upgrade Windows 10 to Windows 11 is built to be seamless, protecting your digital assets is a non-negotiable step for any professional environment. Before you click "Install," taking a small amount of time to secure your data ensures that your spreadsheets, client records, and software configurations remain safe regardless of the outcome.
The Golden Rule: Backup Before Your Free Windows Upgrade
The single most important step in any IT migration is creating a "safety net" for your information. While this free Windows upgrade is designed to be non-destructive, power cuts or hardware glitches during the installation could leave your data in limbo. We recommend following a simple 3-2-1 backup strategy: three copies of your data, on two different types of media, with one copy kept off-site or in cloud solutions. This aligns with the proactive cybersecurity standards used by modern Australian firms to mitigate risk even when rushing to beat the Windows 10 end of life deadline.
- Connect a reliable external hard drive or sync your critical folders to a secure cloud-based storage platform.
- Manually copy your
Documents,Desktop, andDownloadsfolders to ensure nothing is missed by automated tools. - Verify that you can open at least one file from the backup drive on a different device to confirm the data is readable and not corrupted.
Using Professional Tools to Keep Files and Apps Secure
In the rare event that certain folders seem to have vanished after the transition, there are professional-grade tools available to help you keep files and apps safe. Software like Stellar Data Recovery is specifically designed to scan your hard drive for "lost" partitions or files that the new operating system might have moved during setup. When using these tools, it is vital to select the "All Data" mode during the initial scan to ensure the software looks for every file type, from common PDFs to proprietary database formats your business relies on.
Once the scan is complete, you must maintain a clear recovery path to avoid further data loss. Rather than saving "recovered" files back onto your main C:\ drive immediately, browse and select a secure external location, such as a USB thumb drive or a network folder. This prevents the recovery software from overwriting the very data blocks you are trying to rescue, keeping your business records intact and ready for the new Windows 11 environment. Taking these precautions ensures that your hardware continues to meet Windows 11 system requirements without compromising your precious intellectual property.
With your data safely backed up and a recovery plan in place, you can move forward with the installation knowing your business operations are fully protected.
Frequently Asked Questions
Will I lose my files if I upgrade from Windows 10 to Windows 11?
No, if you choose the 'Upgrade' option using the official Microsoft installation tools, your files, applications, and settings will remain untouched. However, it is always best practice to back up your data before starting any major system update.
Can I upgrade to Windows 11 if my PC doesn't meet the TPM requirements?
Yes, there are official methods to upgrade older or 'unsupported' PCs to Windows 11 for free. By using Microsoft's own deployment tools, you can bypass certain hardware checks while still ensuring a safe and stable installation.
How do I check if my Windows 11 upgrade was successful?
Once the process is complete, click the Start button and type winver. This will open a window showing your current Windows version and build number, confirming that you are officially running Windows 11.
What happens if I stay on Windows 10 after October 2025?
After October 14, 2025, Microsoft will stop providing security updates and bug fixes for Windows 10. This makes your computer much more vulnerable to malware and cyber-attacks, which is why upgrading is highly recommended for all Australian businesses.
Sources
- https://www.youtube.com/watch?v=9yfh07Scj-E
- https://www.techdigest.tv/2024/09/upgrade-to-windows-without-losing-data-a-step-by-step-guide.html
- https://community.spiceworks.com/t/upgrade-to-windows-11-from-windows-10-and-keep-files-apps/1236801
- https://windowsforum.com/threads/reinstall-windows-11-without-losing-files-a-comprehensive-guide.360641/
- https://support.microsoft.com/en-us/windows/ways-to-install-windows-11-e0edbbfb-cfc5-4011-868b-2ce77ac7c70e
- https://learn.microsoft.com/en-us/answers/questions/4377311/(article)-how-to-perform-a-custom-installation-of
Need Expert IT Help?
Still stuck, or want this handled professionally? Our technicians provide fast remote and on-site IT support across Australia. Whether it's a one-off issue or ongoing support for your whole team, we've got you covered. Get in touch with OnIT Solutions today.